DESIGN NOTES · 5 MIN READ
A love letter
to curves.
The curve is one of the most loved tools in image-making, and DaVinci Resolve already makes it remarkably capable. Here is why we still felt it needed more room and deeper control—and how that led us to design RedMunky Cacao.
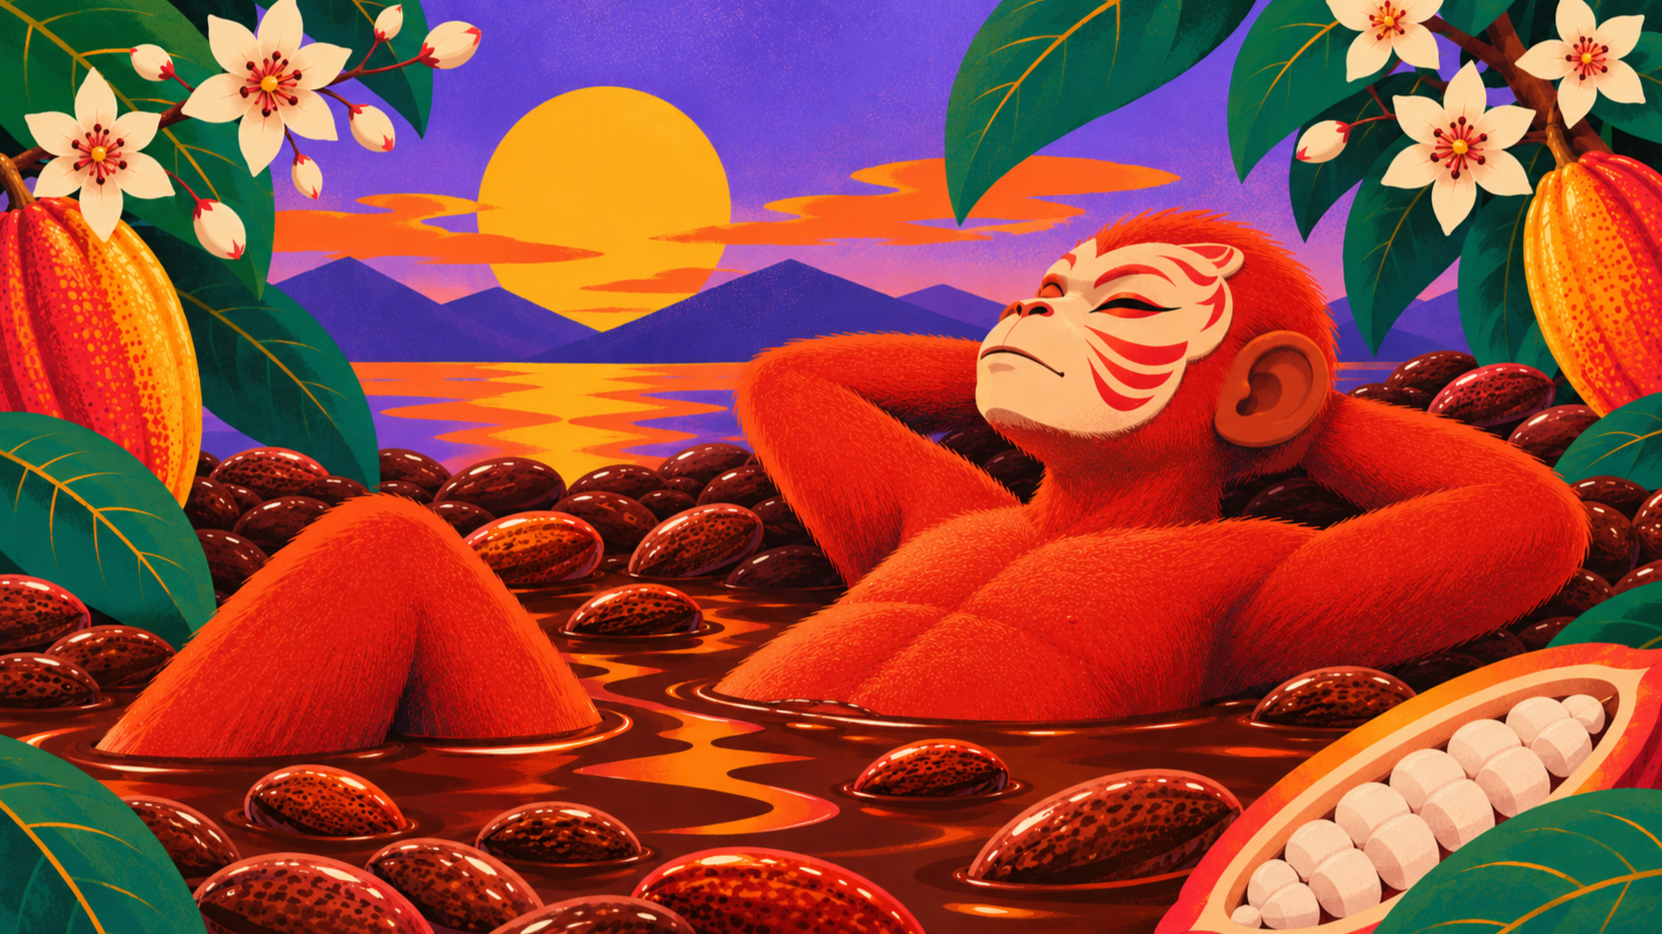
A small bend in a line can change the entire feeling of a frame. Lift the shadows. Hold the highlights. Give skin tones a quiet, filmic density. Unlike abstract sliders or numeric wheels, curves make your decisions visible: you shape a line, and you judge the picture.
That direct connection is the starting point for RedMunky Cacao. Before building it, we reflected on three simple observations from our own daily work: why everyone loves curves, why DaVinci Resolve’s curves are already so strong, and where they still hold us back.
Why we keep coming back to curves
Curves travel across every visual discipline because a single visual graph can express so many different creative decisions. In photography and retouching, educator Unmesh Dinda (PiXimperfect) opens his foundational walkthrough with a sentiment almost every artist shares:
“Today we’re gonna completely understand curves, and by the end of the video I guarantee that most of you will fall in love with this tool.”
In color grading, that appeal is just as strong. Whether you are anchoring exposure and building an entire look around a single RGB spline—as Waqas Qazi demonstrates below—or placing a curve at the very front of a look-design pipeline like Cullen Kelly’s Contour workflow, the curve remains the most direct way to shape contrast and color together.
“We’re going to be focusing on one thing and one thing only, which is curves… You can just build your initial really good S-curve and then go in there, make up for the exposure that was lost, and then come in here and build your look on top of that.”
What DaVinci Resolve already gets right
DaVinci Resolve deserves real credit for how far it pushed curve-based grading. Beyond standard Custom Curves, Resolve’s six secondary curves (Hue vs Hue, Hue vs Sat, Hue vs Lum, Lum vs Sat, Sat vs Sat, and Sat vs Lum) let colorists target specific attributes cleanly without immediately reaching for a harsh key.
As Cullen Kelly explains in his overview of Resolve’s curve toolset, once you understand their logic, curves become one of the cleanest and most forgiving ways to make secondary adjustments:
“That logic that I just summarized is why I think of the curves as my sort of favorite, ideal form of secondary within Resolve’s Color page. Anytime I want to make an adjustment to not all the image, but a portion of the image on the basis of color, the curves are where I start… Once you begin to understand its logic, it is one of the cleanest and effective and most efficient ways of making secondary manipulations to your image… because they’re really, really powerful tools and they deserve our full attention.”
And at 22:40, on why Custom Curves offer finer nuance than primary wheels:
“At their baseline, I like to think of the custom curves conceptually as lift, gamma, gain with more control… You can control your image with more accuracy and more finesse than you can with your primaries.”
He echoes that same philosophy in his Hue vs Hue study—noting how a smooth curve naturally protects the image from the tearing and artifacts that often happen with tight qualifiers:
“I love this tool because in presenting these rotations to us in the form of curves, this tool is going to bias us towards making sensible, gentle, easy adjustments to our image—as opposed to more tight, artifact-prone adjustments like we are often going to find ourselves making with something like a qualifier.”
(These lessons are independent educational references cited for craft context, not endorsements of RedMunky or Cacao.)
Where we still wanted more
Resolve’s curves are genuinely powerful. Yet when we use them every day on demanding projects, we still run into practical limits—both in how the curve feels under the hand and in what a single curve can target.
First, intricate curves in a small docked panel take more time and invite unwanted bumps. As Kelly notes later in his 7-curve breakdown, adding multiple control points in Resolve’s docked graph quickly becomes delicate work:
“We don’t want to use any more control points than we need to. You want to use the bare minimum that you need in order to get what you’re trying to accomplish within your image—because the more you add, the more likely it is that you’re going to create problems and the longer it takes to make the adjustment… These custom curves aren’t quite as fast as your primaries… Custom curves take a little bit more time to manipulate.”
That physical delicacy has been discussed by colorists for years—including a 2016 Creative COW thread where a Wacom user noted how simply clicking to place a point in a compact graph can slightly nudge the curve.
Second, standard secondary curves affect the entire hue or luminance range at once. When broadcast colorist Darren Mostyn demonstrates Hue vs Saturation on a red headscarf, you can immediately see the trade-off when two elements share a similar hue range:
“For example, we’ve got here Hue versus Saturation. If I click on her red headscarf there, I can literally pull down the saturation just in the red—you can see it’s also affecting her face and her lips, but you get the general idea.”
Built-in Resolve Curves
- Docked in the lower panel: Your eyes constantly travel between a compact graph at the bottom and the image in the Viewer.
- Six fixed secondary pairs: Great for broad moves, but you cannot isolate a specific color zone first and then choose how its range and adjustment behave.
- Separate nodes for complex isolation: Separating skin tones, skies, and neutrals across different ranges usually means building extra parallel nodes.
- Static while zooming: When you zoom in to judge fine detail, the curve remains small in the lower dock.
Why We Designed RedMunky Cacao
- Spacious Viewer HUD: Shape the spline directly over your image with generous room, square control points, and smooth tangent handles.
- Zone, Range & 13 Adjustments: Isolate a color zone first, choose whether the curve responds to Luminance, Hue, or Saturation, and shape 13 distinct adjustments.
- Multiple zones in one node: Keep your skin tone, sky, foliage, and neutral refinements organized together inside a single node.
- Moves with your Viewer: Let the curve follow your pan and zoom as you inspect detail, or lock it in place whenever you prefer.
Three decisions. One spacious place to work.
We designed RedMunky Cacao to keep everything we love about Resolve’s curves while giving them the breathing room and flexibility we wished we had in our own grading sessions.
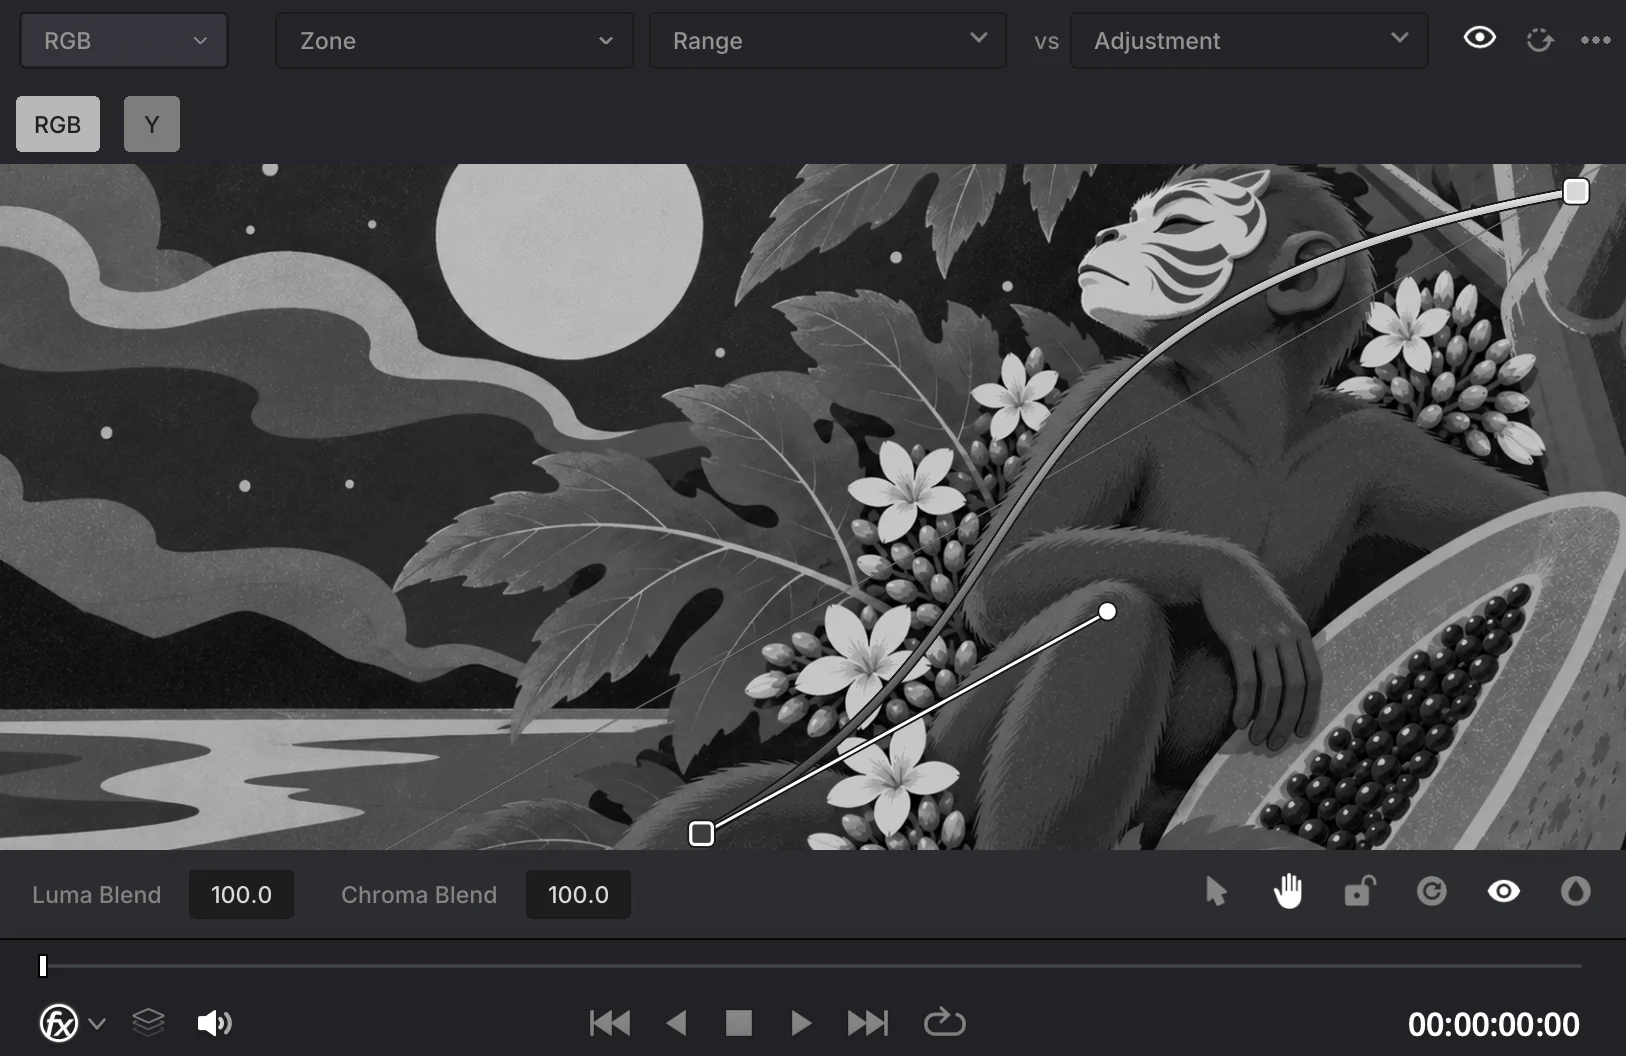
RedMunky Cacao brings a full-size spline editor with square control points and tangent handles directly into the DaVinci Resolve Viewer.
Instead of jumping between panels, every adjustment in Cacao follows three calm, deliberate steps:
1. Choose a Zone: Work across the whole image, or target a specific color zone—including dedicated Skin Tone and Neutral zones—all within the same node.
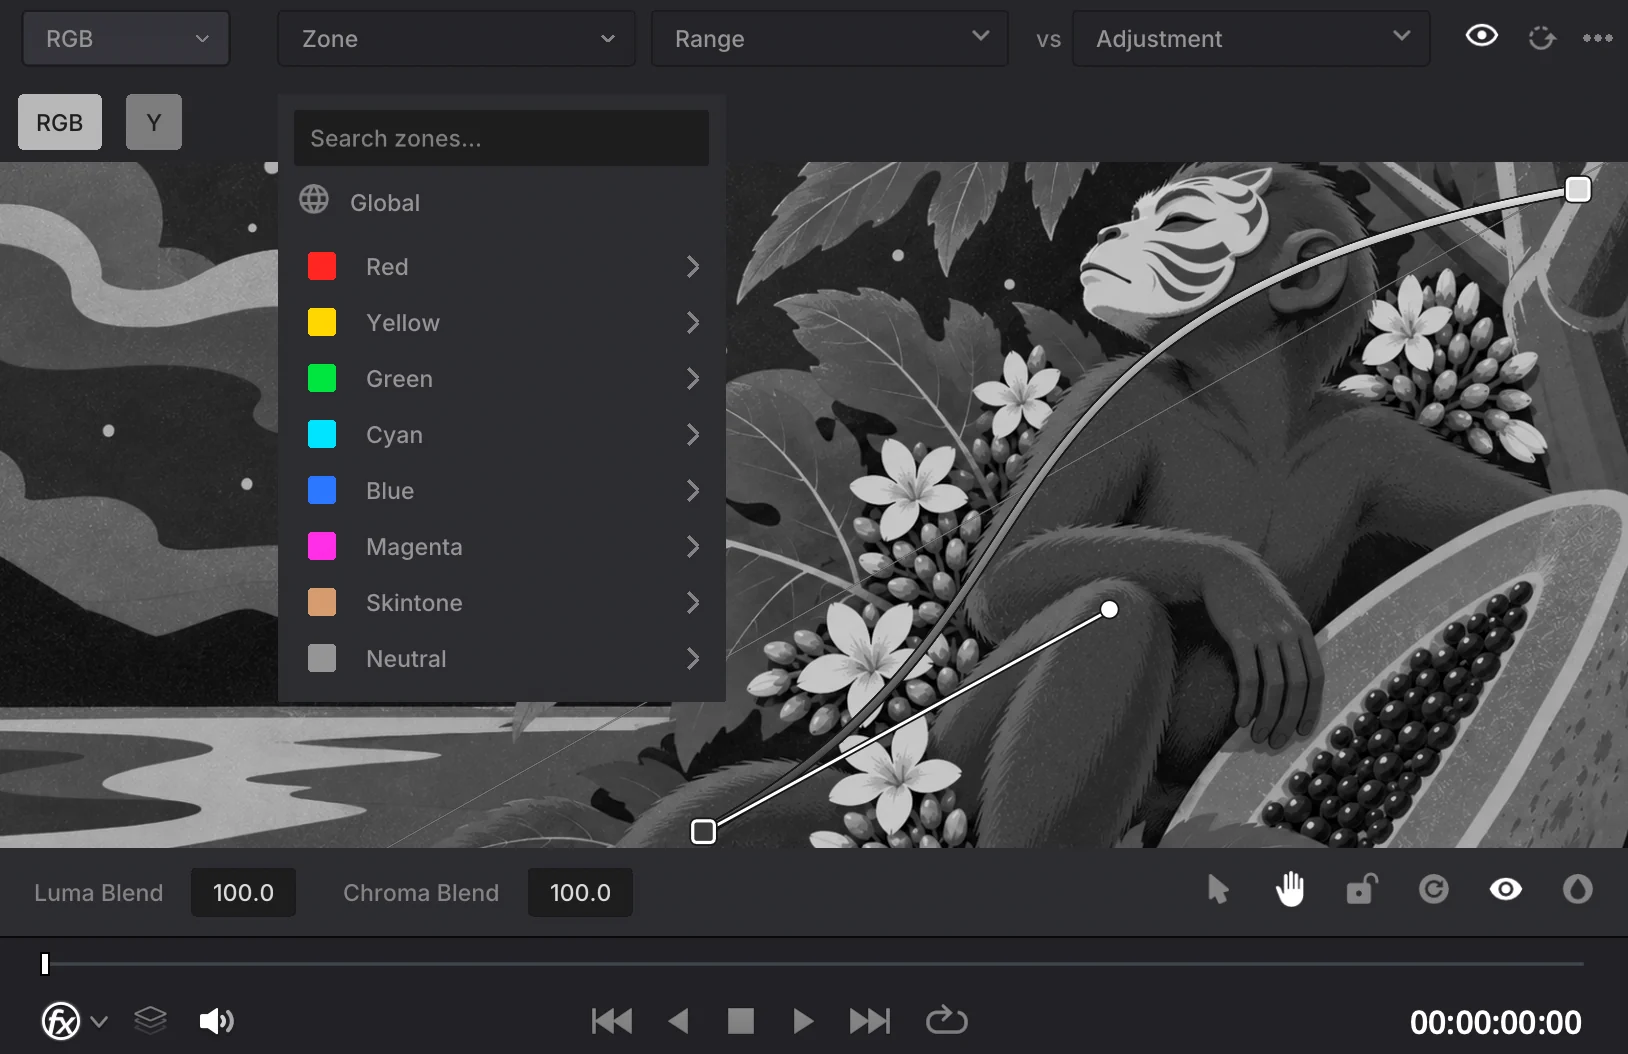
Select the exact color zone you want to work on, keeping multiple zones neatly organized inside one node.
2. Set a Range: Choose whether your curve is driven by Luminance, Hue, or Saturation within that zone.
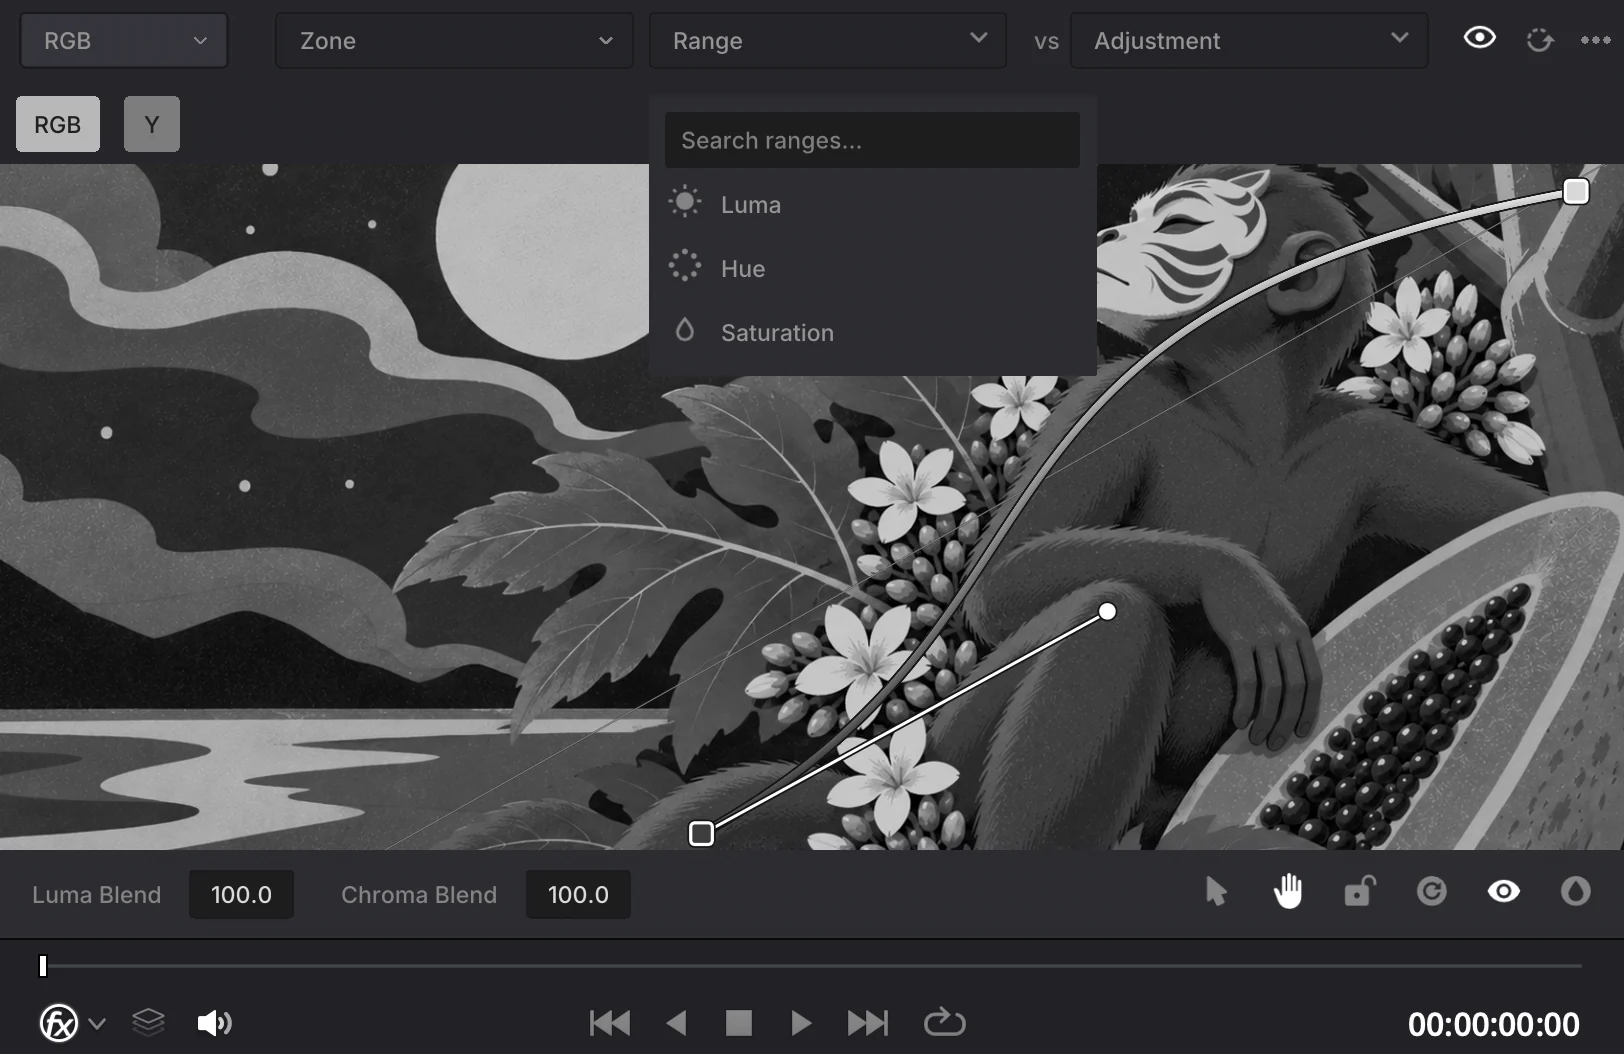
Drive any chosen zone by Luminance, Hue, or Saturation for finer control over where the adjustment lands.
3. Shape an Adjustment: Pick from 13 adjustment types—from filmic Density and Hue rotation to Saturation, Vibrance, and channel balance—with tactile sliders for Luma Blend and Chroma Blend.
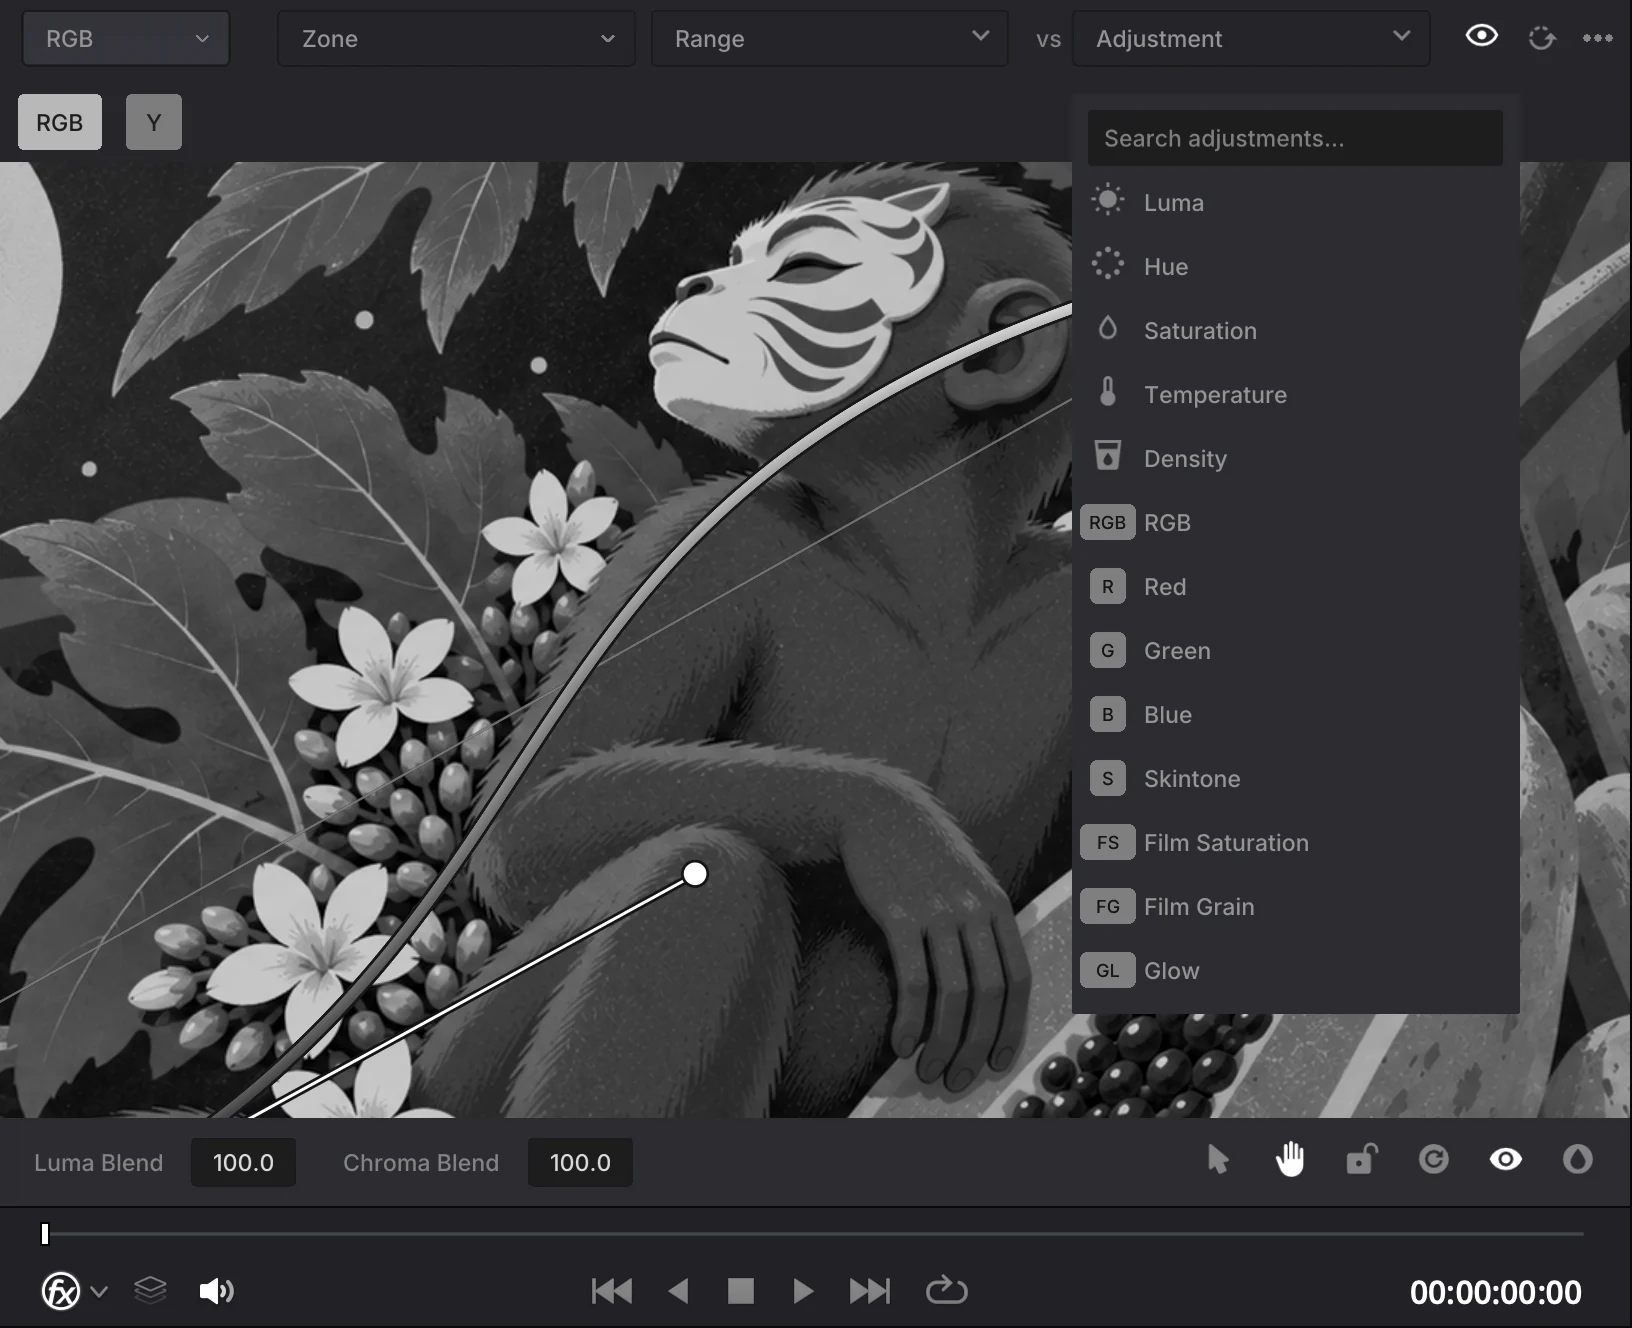
13 adjustment types let you shape tone, color, and density right where your eyes are judging the frame.
The curves you love.
More room to make them yours.